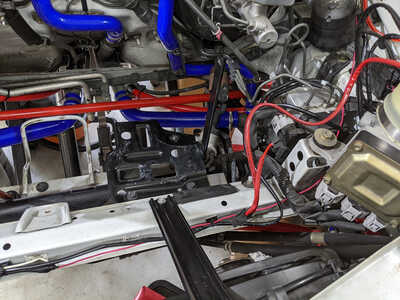
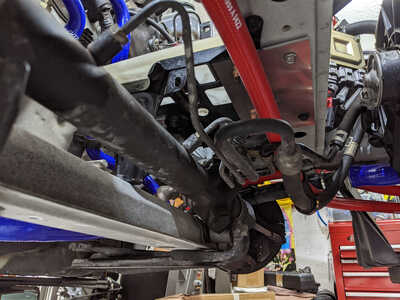
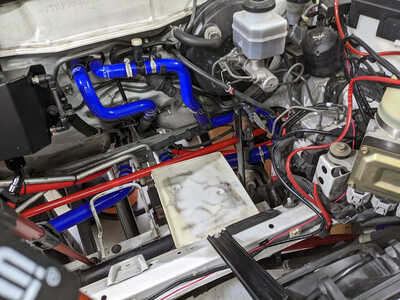
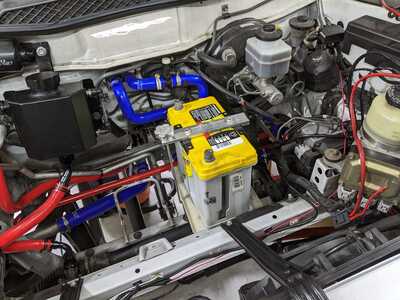
Have you always wanted to have a little more space in the engine bay to route a short ram air intake or maybe some catch cans, but there isn't much available? Would you like to shift a little weight to the front of the car from the rear? Do you already have a bunch going on up front and have removed the spare tire bin already (Please note that I have not tried to fit the spare tire bin back in the car after doing this mod. It might fit, but it is not likely.)?
If you answered "yes" to all of those questions, then this is the write-up for you!
Step 0.
Gather your tools. You will need the following:
- 10mm socket and wrenches
- 12mm socket (For removing battery tray from stock location)
- m6 rivet nuts (At least 5 or 6 of them)
- Tool to install rivet nuts.
- Drill
- Clamps
- Work table or surface.
- 9mm drill bit for metal
- Also some smaller metal drill bits so you can gradually step up to the 9mm hole
- m6 bolts with 10mm head (At least 4)
- washers that will fit around m6 bolts (4 or 6 of them)
- 4"x8" aluminum plate (Can be found on amazon or if you have scrap aluminum or stainless plate just cut a piece off in that size).
Step 1.
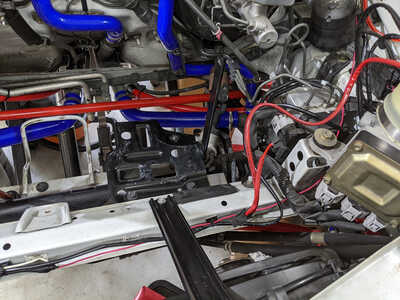
Remove your battery and stock tray. I do not have pictures of this, but there are 3 bolts to remove it and they are in obvious places. You will want to lift off the plastic floor pan piece first of course. Then save these as both will be used up front. You will need to drill a hole about 8mm to 10mm in diameter in the recessed section that will run towards the front of the car when mounted in the front. Please see the 2 bolts in the below pic for a reference for where to drill the hole.
Please note that you will be using the large existing hole as well for a bolt.
Step 2.
Remove the plastic frunk surround and the spare tire bin. The frunk surround may come back and might need some modification. More on that in later steps. While these things are out of the way. Clean up the area so it looks nice. Otherwise, you will end up with pics of dirty components like mine.
Step 3.
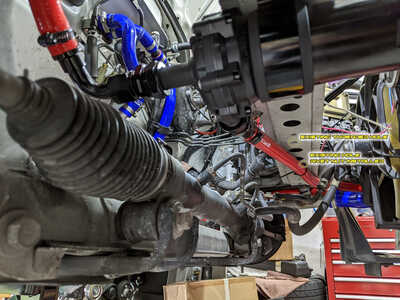
Get your car in the air as much as you can so you can get under it easily. If using a jack, be sure to use jack stands and make sure everything is sturdy. Then remove the under cover plastics to gain access to the metal cross members.
Step 4.
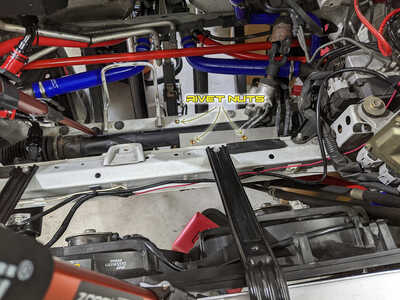
Locate 2 threaded holes near the center and a smaller offset hole towards the left (drivers side in LHD). That offset hole to the left needs to be widened to 9mm if it is not already. the threaded hole is already m6 or similar. I used a random bolt I had that threaded into it best. See pic for details:
Don't pay too much attention to the a2w hose that is currently using that 9mm hole. I secure that in a different way later.
Step 5.
Install a rivet nut in the 9mm hole.
Step 6.
Measure and mark where you will need holes in your plate in order to secure it to the threaded holes noted above. Be sure your measurements are accurate and bring your plate to a work surface and clamp it down. Drill holes at your marks and give it a bit of room for some slop on the hole where the rivet nut will be used. You'll thank me later for giving yourself some extra wiggle room (literally).
Step 7.
Now, bolt your plate up to the cross bar thing with now threaded holes. Use about 2 washers on each bolt to space it down a little. Then place your stock battery box on the plate and wedge it between the bottom of the cross bar and the metal plate. The vertical standoff that the battery clamp mounts into should be facing the left side of the car. This will put the lowest section with the mounting hole low down by the bottom cross member. Mark the location where that lower hole is on the cross member.
Since you already drilled your hole in the battery tray as described in step 1, you will need to mark that location and the other large hole as well on your metal plate and then remove everything from the car and bring them to your work surface for some drilling.
Step 8.
Drill 9mm holes in the 2 locations you marked and then install a m6 rivet nut in each hole. Then drill a 9mm hole in the top of the cross member and install a m6 rivet nut in the place you marked in step 7. NOTE: You might want to use some touch up paint on the bare metal that is left after drilling the hole in the cross member before installing the rivet nut. That's what I did anyway.
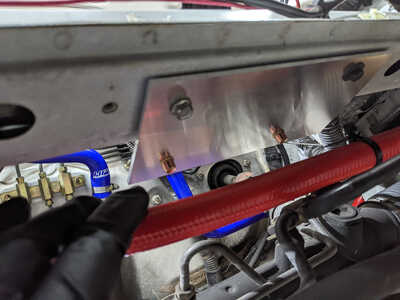
Go back and bolt up your plate again (remembering to use about 2 or 3 washers for spacers). You should be left with what looks like the following.
And this is what you should see from above
Step 9.
And now, you will use some m6 bolts and secure the battery tray in the 3 locations. Be sure to wedge the edge between the metal plate and the cross bar as when taking the measurements.
Step 10.
You will probably have to trim about 1/4" off of the side of the plastic floor/tray in order for it to fit properly.
Aside from this last cut, the whole process is 100% reversible. And really, all the cutting of that plastic piece means is that you would have a cut plastic piece if you put everything back to the stock location.
Next up...
Still left to do is:
- Run wires through tunnel to the rear
- Add battery terminals
- Add inline 150amp fuse in case of disaster.
- Hook up with wiring in the rear.
Those will be in the next post.
You might be asking yourself "But I make use of that nut that is in that exact position on the battery tray for _______ ". I will post what I did to solve that as well later.
Get your Short Antennas, Decals, and all sorts of goodies at:
https://takubanmotorsports.com
So, it took a while to get back in the garage, but the relocation is finally complete (Aside from actually testing it, but there will be a ton of stuff to test at some point).
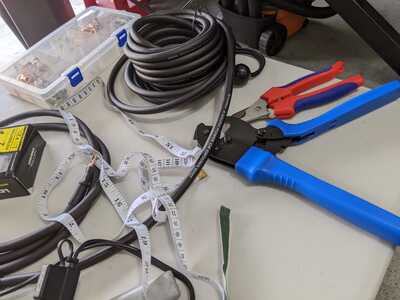
I started off by setting up a work surface and gathering the tools and materials I was going to use.
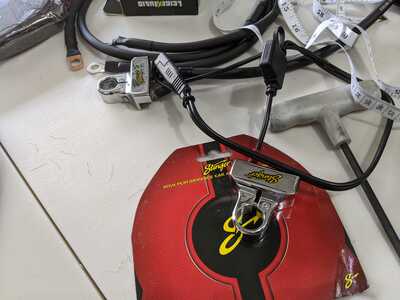
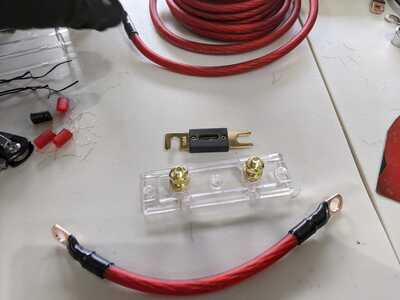
Once I had everything (or mostly everything) I needed, I took some measurements and planning my wire routing. The measurements were to figure out the length of lead I needed from the fuse holder to the positive terminal. Then, I created the lead that would go from the fuse holder to the terminal.
After completing that, I used a ziptie and held the positive and negative cables together at the appropriate positions and started to add my sleeving from the opposite end to meet up with the point that the cables no longer need to be next to each other. This took a long time and was fairly tiring on the arms. I sleeved all 25 feet of cable I had since I wasn't sure exactly how much I needed and didn't want to create unnecessary waste or worse yet, have cables that were too short!
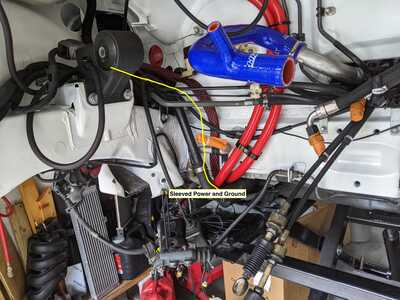
I routed the cables in the tunnel following about the same path as my A2W hoses, but more in the middle. Then they poke up in about that same spot too and run to over by the stock location of the battery.
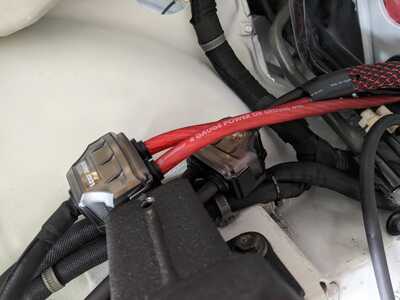
Now that the cables were there, I needed to attach the 2 grounds that normally go to the terminal (the one for the strut tower and the other that attaches to the transmission. I also connected to the main power cable (which was an 8 AWG cable) without the fusable link since I have a fuse up by the battery. I ran a line into the cabin to be able to power other various things as well as for some sound options (amp + sub) because why not? and now is the time to do it.
I might further protect the connections from the elements, but the distro blocks I used are water resistant and mostly water tight. NO matter what, I wanted the ability to service this setup if the need ever came up. That's why I didn't just connect it all directly and shrink tube it all.
Next up, the final touches...
Get your Short Antennas, Decals, and all sorts of goodies at:
https://takubanmotorsports.com
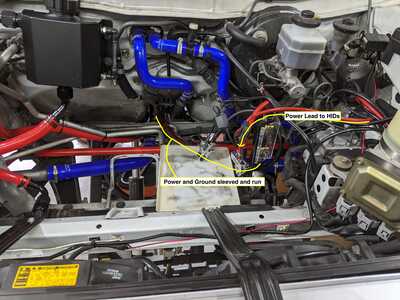
OK. I know this isn't a good pic of the ABSOLUTE FINAL setup. But it's 2 pics that you can use your imagination on. Basically, I didn't want to connect anything to the actual battery, but I wanted to get it all setup to be ready when I am.
Here's the battery clamped down in place:
The battery is very sturdy and secure. does any keen eyes recognize the Serina Battery Tie Down that I had her use my takuban motorsports logo and takuban symbol? That holds the battery, however, I have to really tighten way down. So I created some plastic spacers/shims that will help to make an even more solid connection. You can still see the HID power wire just hanging off to the side in that pic.
And here's a pic of the cables, fuse and HID power lead all hooked up and ready to rock.
You can see where I routed the cables a bit in that pic as well.
Post Mortem:
I'm mostly happy with how it came out. Ideally, I would have gone with a super custom Odyssey battery and installation. But I can still do that later if I choose to. I will be updating my battery tender setup and have it plug in somewhere on the front bumper cover (Maybe near the tow hook location). I'll figure that out when it comes time to put the front bumper cover back on. AKA: Future Justin's problem.
I realize this isn't an exact step-by-step how to on the process. But most of it is fairly custom anyway and you may want to do some things a bit different anyway.
Get your Short Antennas, Decals, and all sorts of goodies at:
https://takubanmotorsports.com
OK. all wrapped up (aside from mounting and running a fuse/relay box that is unrelated to the battery relocation, but I will be attaching another ring terminal to the positive battery terminal when doing it. 😉
I know it is not 100% detailed in all aspects and I forgot to take some pics along the way. But if you have any questions, go ahead and ask and I'll do the best to explain my answer in more detail.
Get your Short Antennas, Decals, and all sorts of goodies at:
https://takubanmotorsports.com
So to be clear the main positive battery cable that runs from the battery to the engine compartment is 8 AWG?
and
if so how did you determine the size needed?
what size is the ground cable? (sorry if I missed it)
looks like a great mod, well done
Thanks! I'm happy with how it came out. I am definitely not able to carry a spare tire anymore though. 🙁 But oh well, if I go on any long trips, I'll figure something out then.
I used 4 awg for both positive and negative from the battery since I will be adding some audio stuff and figured better bigger than smaller. I determined the harness cable size by visual inspection along side the other 8awg cable I had. I don't remember the stock ground cables size, but I used 8awg for the 2 cables that would normally come from the battery terminal.
Get your Short Antennas, Decals, and all sorts of goodies at:
https://takubanmotorsports.com
That should work fine
as for a spare tire
I picked up 29 Ford highboy roadster and there is no place for a spare
not to mention the front and rear tires are two different sizes like the Spyder but more of a difference.
I carry a can of fixaflat, a cheap tire plug kit, and a battery operated portable air compressor gun, (looks like a screw gun and is not real big). It will inflate two tires from flat on a single charge.
hopefully I never need them
Yeah. I have a tire plug kit and will garb one of those small inflators now that they are readily available.
Get your Short Antennas, Decals, and all sorts of goodies at:
https://takubanmotorsports.com
$60.00 from Amazon, was highly recommended.
https://www.amazon.com/gp/product/B07CTGM2LD/ref=ppx_yo_dt_b_asin_title_o04_s00?ie=UTF8&psc=1
FYI: I am already at Episode 10 in my overall build series on my YouTube channel. This one deals with the battery relocation:
This will add a bit more to the pictures and other details that I posted earlier.
Get your Short Antennas, Decals, and all sorts of goodies at:
https://takubanmotorsports.com
