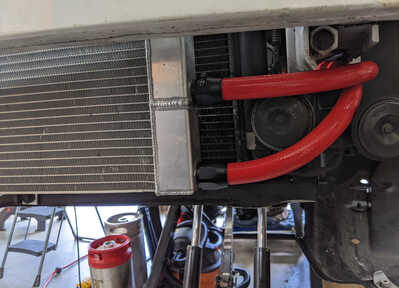
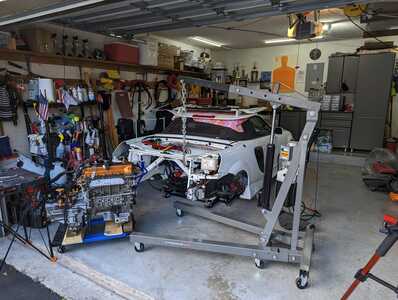
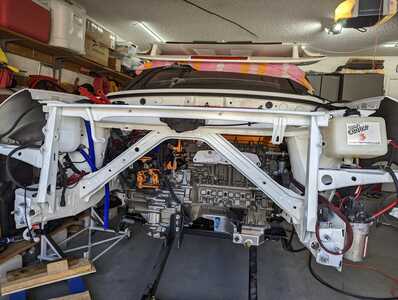
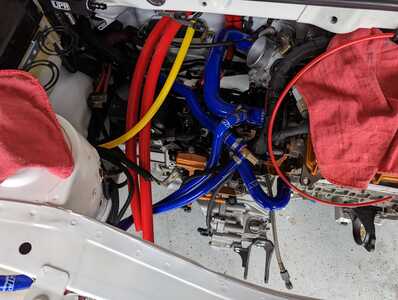
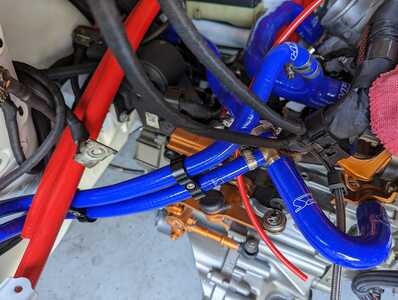
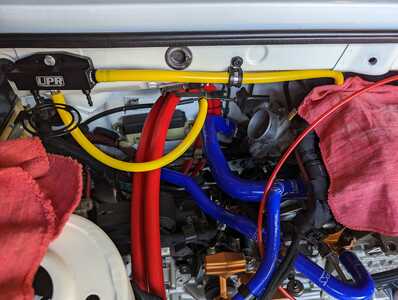
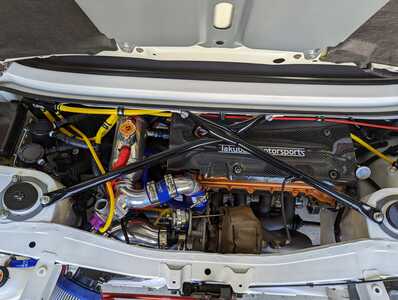
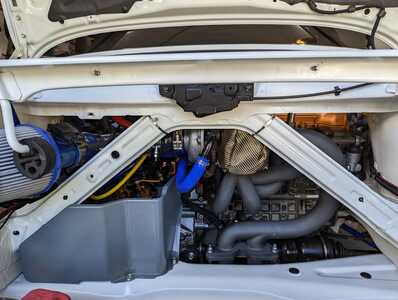
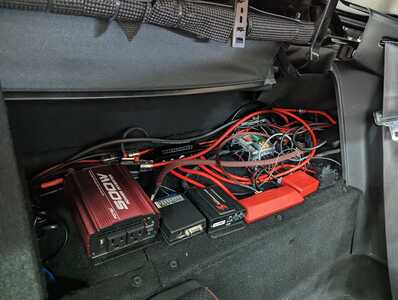
Very nice! Why did you make the oil cooler sit sideways?
That's the way it came from AuburnSpyder way back in the day. That's who I bought the kit form originally.
Very nice indeed
LT if you keep it up UM will have the second best white Spyder
what is the black bracket used for?
Thanks! I've still got a ways to go, but it is coming along. The black bracket that I think you're referring to is the right side motor mount. It's an innovative 85a urethane mount. I have the full set of those.
I'm mostly done with things in the engine bay before the engine goes back in. There are a few more things to put in place and get setup, but it's almost time to REALLY make some progress towards being able to start the car again.
I have decided to officially go with a Gundam color scheme with regards to the various mods and such. My reasoning is simply because I have both red and blue items from different companies. I also have black as well, but I will be painting some things that didn't clean up well in a light gray color since they will go with the theme pretty well. And I'll add a few yellow accents (vacuum hoses). If those yellow vacuum hoses look bad, then I'll just go back to blue, red, or black for those in the engine bay. Inside the car, the vacuum hoses will be red (But that's something you'll just have to wait and see once I have it all in place.).
My overall gameplan for this project is to get the car running so that I can move it around on its own. Then, I'll be finishing up interior things and other items that aren't necessary to the car running and driving on the roads. Do I need bumper covers installed to drive on the road legally? Anyway, I'll need to immediately get an alignment and then begin the tuning process using CoPilot. I'll keep posting some pics in here as I'm able to make progress though.
Thanks for following along and for the comments and advice.
Get your Short Antennas, Decals, and all sorts of goodies at:
https://takubanmotorsports.com
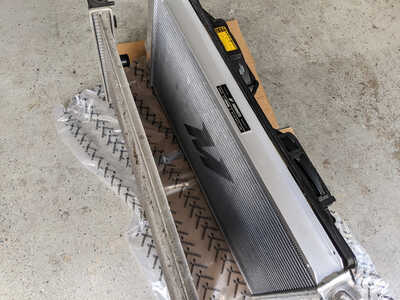
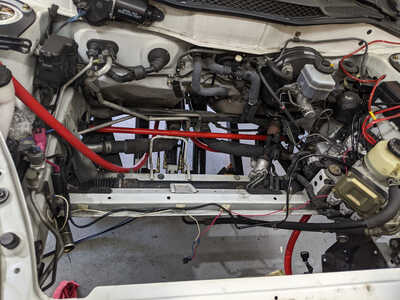
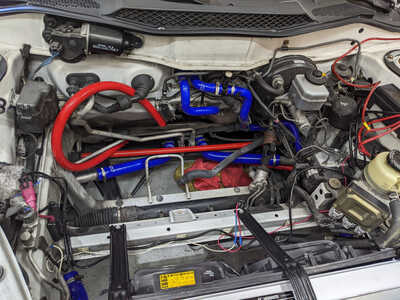
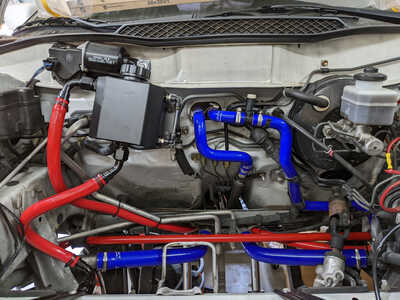
As part of the tremendous scope-creep that has been happening with my project, I replaced my radiator yesterday (as well as the filter thing from the A/C heat exchanger area and swapped out the heat exchanger for my a2w setup. I also replaced all of my coolant hoses up front with HPS silicone hoses. Here are a couple pics...
Radiator comparison:
And here's a pic of the coolant hoses after being swapped out:
I didn't get many other pictures of the other work I did, but I did record some video that will eventually make it into a youtube series that I have planned. haha.
I plan on cleaning a lot of stuff in the frunk area now and then get started on planning and mounting the other a2w components (swirl pot and pump). Then, I'll make the hoses to connect those all up.
Get your Short Antennas, Decals, and all sorts of goodies at:
https://takubanmotorsports.com
I like what you’ve done so far
nothing better than making it run better and looking better
... And here's a shot of the swirl pot mounted and all hoses made and connected in the frunk area.
The connections to the heat exchanger in the front are nice and snazzy too. Check 'em out:
So... One thing that I keep going back and forth on is if I should have put a swirl pot / overflow tank in the system at all. The reason I bring this up is that I have a pressure relief filler cap on top of the intercooler. And I think that cap location is the highest elevation in the system. So, now I have 2 caps basically. The thing I like about having the swirl pot is that I can add Ice to the mix or service it a little easier. It might also help to keep air bubbles away from the pump?
Do any of you guys have thoughts on this?
Get your Short Antennas, Decals, and all sorts of goodies at:
https://takubanmotorsports.com
Having extra ability to remove air pockets can't be a bad thing.
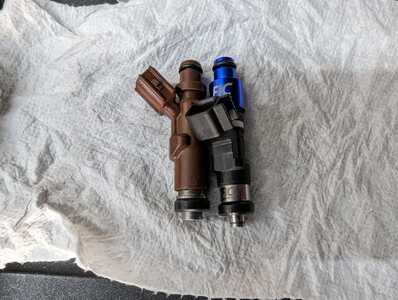
I haven't posted a lot in here lately, but I have made some progress. One odd thing though... Those fuel injectors I got form FIC did not fit right. The connection point where the wire harness plugs in was too low on the injector itself. I called them and sent the injectors back to them and they adjusted them and sent them back to me all within the same week. I checked the proportions next to a stock injector and it looked good. I'll hopefully be able to install them soon.
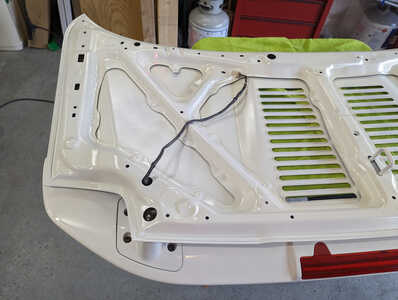
I installed a fuel pump, did some wiring inside the cabin, relocated the battery to the frunk, cleaned some more components, painted the underside of my decklid and my C-One underpanels along with some other bits.
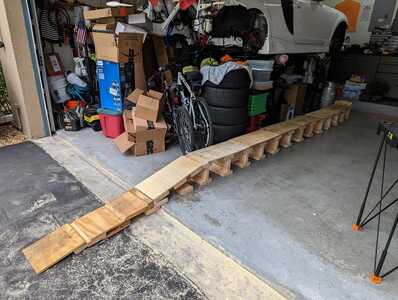
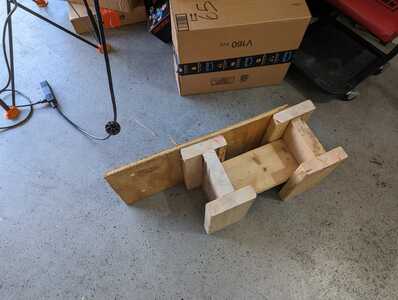
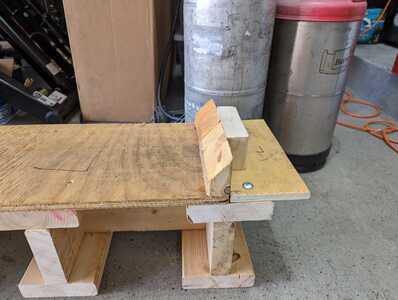
And I made new ramps out of the old materials so I can get a bit more height and space the arms from the body in order to make working on the middle of the car a bit easier. Rather than go through all the details, I'm just going to dump some pics in this post. I will try to edit and post the video on making the ramps sometime within the next month or so.
Anyway... PICS!!!!
Get your Short Antennas, Decals, and all sorts of goodies at:
https://takubanmotorsports.com
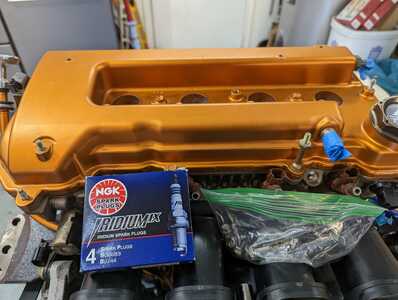
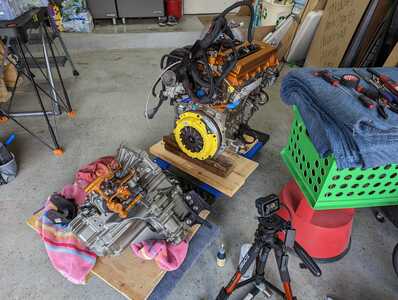
Here's a few pics of the latest progress. The engine is in the car now. Mounted on 3 of the 3 mounts as of this writing. I'll be moving along much quicker in the coming weekends. But most things are nearly complete for the first start to make sure all is working. Then it will be putting the rest of the parts back on, tuning, etc.
... Anyway, enjoy the pics...
Get your Short Antennas, Decals, and all sorts of goodies at:
https://takubanmotorsports.com
Wow - just turning to spring and the colors are poppin' in your garage. Looks awesome with the detail you put in.
Good luck finishing up the install and getting on the road! (though I don't think you will need luck)
Almost there!
I am getting even yet still more closer. I'd say I have about 3 more weekends (maybe 4) before it's time to get an alignment and start tuning it. But it will be all back together at least.
Once the cat-back is installed, the rest is just putting the bumper cover and misc things back on. I do have some stuff in the interior to finish as well. There are many things not yet re-installed. But I plan to get to that this coming weekend.
Get your Short Antennas, Decals, and all sorts of goodies at:
https://takubanmotorsports.com
Good to hear about completion. After driving my car yesterday I feel sorry for anyone not enjoying their car now.
Each weekend, I'm able to get a little closer to the finish line of this project. More projects are already known and parts are on hand, but I will take a little break from projects on the car after this main one is complete. Anyway, here's the latest...
I have completed all of the interior items that I'm going to do for this project* (There are some future project plans that will do more stuff). This includes:
Rear Compartment Items:
- Running wiring for connecting head units to:
- VSS
- Reverse signal
- Reverse Backup Camera
- Boomslang harness for some future proofing and ease of work connected to the A'Pex-i PowerFC
- Securing all cables and modules for:
- PFC DataLogit
- Snow Performance Meth/Water Injection controller
- Vacuum distribution block for controllers, sensors, RRFPR, etc.
- PLX WB O2 Module
- PLX SM-PRO tracking
- Boost
- Oil Temp
- Oil Pressure
- WB O2 from module
- Greddy Profec boost controller
- Autometer boost gauge
- And more!
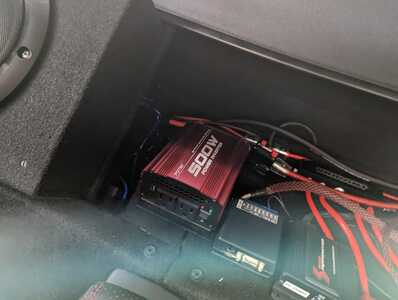
- DC/AC Power Inverter
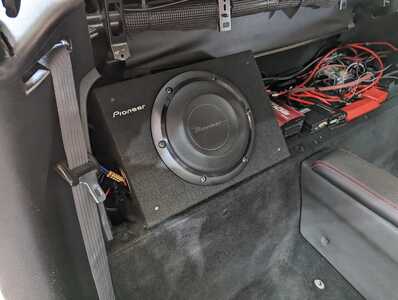
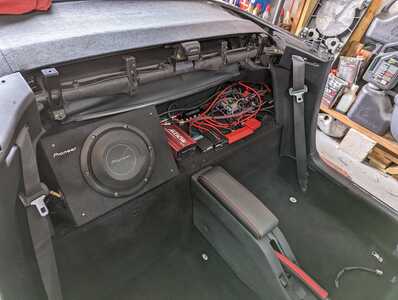
- Mounted 2 Amplifiers (One for speakers and one for subwoofer)
- Mounted Slim subwoofer to the custom rig holding the amps.
General Interior Items:
- RexyPow center console with custom cup holders and USB charger
- Cyclehead arm rest, e-brake cover, shift boot, door arm rest pads
- Door cards and handle wraps will be installed during a later project, but those parts are already purchased.
- New style HVAC knobs with Tak-Ring gap fillers (Yes. Shameless plug)
- Greggs Gauge Pod with updated wiring behind and some custom 3D printed peg-keepers (for lack of better term).
- LT Kick Panels back in place
- Pioneer AVH-W4400NEX Head Unit plus SiriusXM module
- User Interface for Greddy Boost Controller
I might have forgotten something or just not listed it because it wasn't as noteworthy, but the interior can now be checked off as complete!
Oh, here are some pics of the rear storage areas...
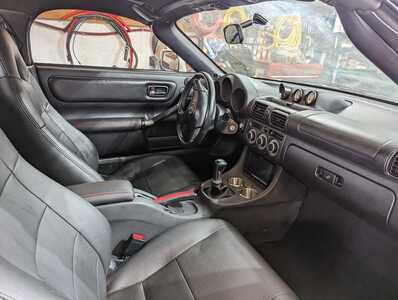
And here is the interior in general...
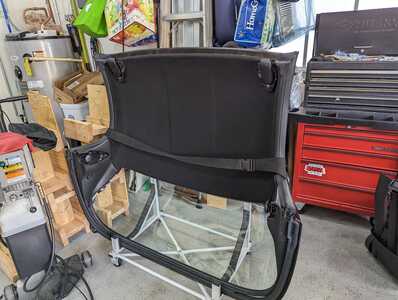
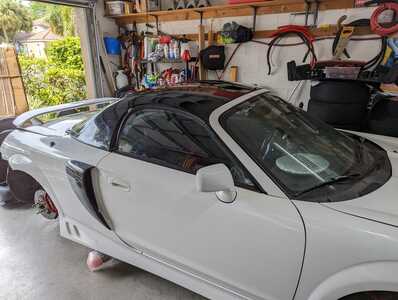
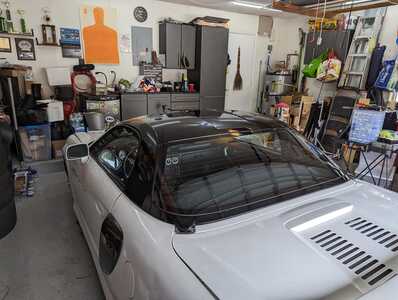
You might be wondering "Why would he put the top up and then take the pic? The lighting would not be that good.". And your thought is correct. But my soft top is not up. 😉
Yes! I am finally part of that Hard Top Life! I've had this top in storage for the past 3 years while working on this car. Luckily, I bought it when I did since the prices on these things are super high right now! I am currently undecided if I'm going to paint it white to match the car whenever I do get a paint job on the car, or if I'm going to leave it black.
Anyway, that's all my updates so far. I'm very close to being able to drive it again.
Get your Short Antennas, Decals, and all sorts of goodies at:
https://takubanmotorsports.com
That’s cool LT. Nice to see an aftermarket stereo system. I blew my small sub last year and will be replacing it with a new one that is getting a lot of buzz for its very small footprint and being able to play clean and low.
I hope it works out.
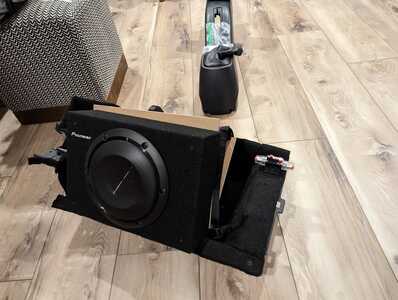
Yep. I was originally going to try to make a custom box and all that stuff and found this Pioneer unit that was already slim and in an enclosure that was easy enough to mount up to my amp rig solution. I'll try to find my other pics of the setup to show the details of how it all fits together. Full Disclosure: I haven't heard anything yet since i'm still putting the car back together and the battery is disconnected. hahaha.
Get your Short Antennas, Decals, and all sorts of goodies at:
https://takubanmotorsports.com
OK. I found them! This project has gone on for so long that remembering WHEN I did something is getting more and more difficult. I've had this whole rig setup and ready to go in for several months. When I do the YouTube video with it though, it will seem like I am doing it at the same time as installation. hahaha. Movie Magic FTW!!!
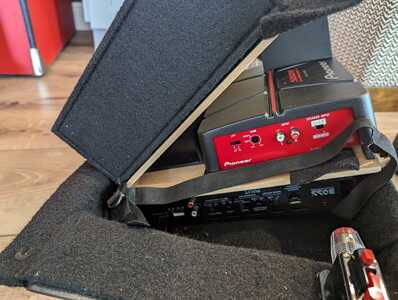
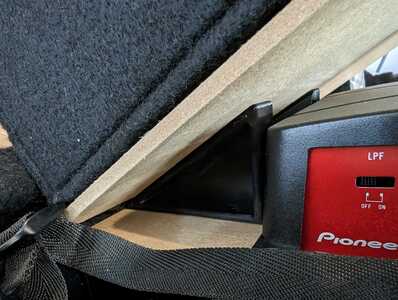
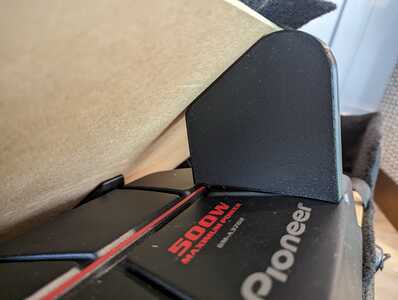
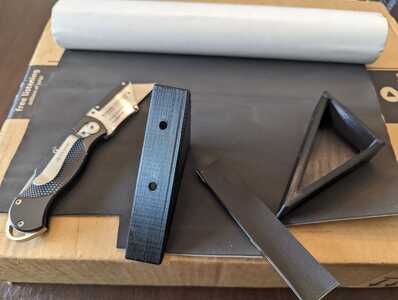
Anyway, here are some pics of the setup. All Pics are simply mock ups. The final version is convered in trunk carpet and looks like the above pictures. I'll list some details below the pics...
This was a combination of MDF "sheets" that I got on amazon that were the perfect size for this project and some 3D Printing and CAD work. There are 2 loser brace/brackets that form the wedge. There are holes that I'm bolting to the upper MDF and the lower portion is attached with heavy duty push-in clips. The upper brace/bracket is bolted to the upper MDF sheet and rests on top of the Pioneer amp and fits directly into the grooves and follows the contour perfectly. I have some dense foam padding all around the brace pieces. The whole rig makes use of 2x MDF sheets. The Amplifiers are bolted to it. THe one that is mostly out of view is the amp for the subwoofer. The Pioneer amp is for the regular speakers. This also makes my stereo setup look like it all matches (Pioneer HU, Sub, Amp). So that works out well too.
It may be hard to tell from the photo, but the bare MDF was carpeted.
I would share this design, but it is really bespoke to my exact setup. I doubt it is universal enough to work on everyone's car and products.
Anyway, Thanks for looking. 🙂
Get your Short Antennas, Decals, and all sorts of goodies at:
https://takubanmotorsports.com
