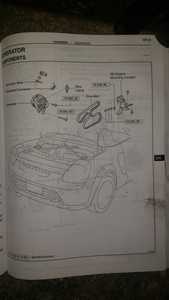
Quick background: although I had no issues with my battery charge, my alternator began to have an unholy whine. While this points to the pulley, a full swap just made more sense IMO.
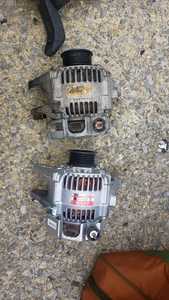
The Celica GTS MT alternator is part number 27060-22200. I went with A Denso remanufactured unit (Part number 2100593) which is an alternate part number for the GTS MT alternator. FWIW during my research it was conveyed that the manual trans (MT) alternator is sturdier at high rpms than the automatic trans (AT) version.
Tools:
-21mm socket - To remove lug nuts
-18mm socket (?19mm socket) - To remove serpentine belt
-14mm socket - motor mounts & lower alternator bolt
-12mm socket - Upper alternator bolt
-10mm socket - Detatch battery & remove alternator generator wire
-Socket extensions
-Breaker bar / cheater bar
-Hammer
-Jack/jack stands
-2x4 or some piece of wood to use floor jack under the oil pan
A few disclaimers: My car has a 2zz & is lowered on coilovers.
1. That said, my first step was to jack up the car and support the rear on jack stands with the RR wheel removed. This was done to ensure easy access to the motor mount bolt which is accessed from within the wheel well. At this time the battery can be disconnected using a 10mm socket. While I'm sure someone will say you can do the job without disconnecting the battery I don't see why one would.
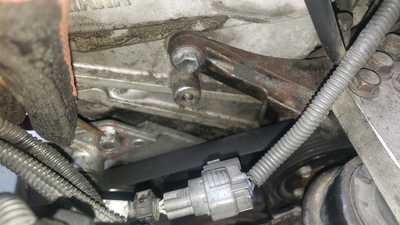
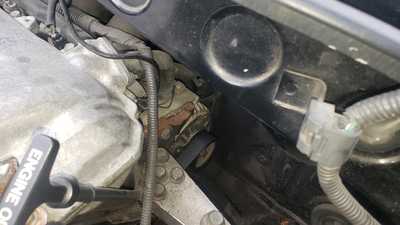
2. The serpentine belt must be removed from at least the alternator pulley (or removed entirely if you prefer). Take your 18mm socket with breaker/cheater bar and loosen the belt tensioner by turning to the right (towards the front of the car). I have seen people refer to this as requiring a 19mm socket, however on my car an 18mm socket fits perfectly. Check both sizes on your car & use the appropriate socket so as not to strip your bolt (If this occurs you would need to replace the entire belt tensioner assembly). It is easiest to remove the belt from a smooth pulley wih no lip if you are having difficulty loosening the belt tension enough to clear the lip on the alternator pulley.
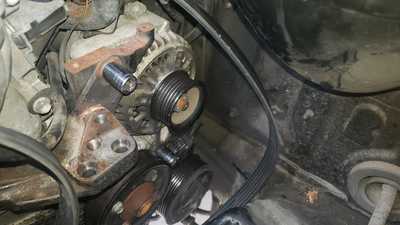
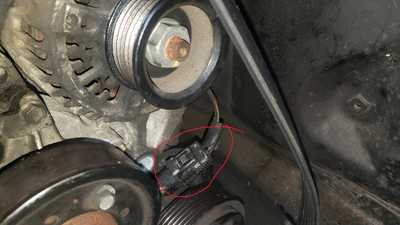
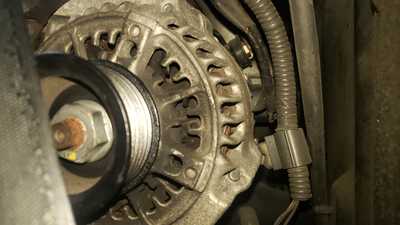
Red circle shows the correct place to loosen the serpentine belt tension (18mm socket). Second picture just shows the alternator/pulley with belt in place.
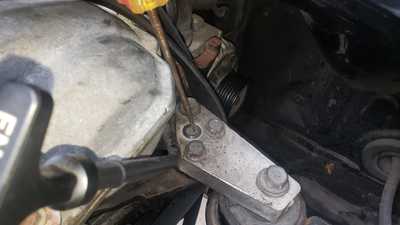
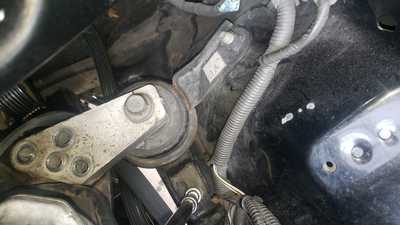
3. Now remove the motor mount. I chose to remove the mount from the engine, then from the car's body. Every motor mount bolt requires a 14mm socket. Removing the bolt in the wheel well is very easy with the RR wheel removed. If you're on stock suspension you may have enough clearance to reach this with the wheel in place, but removing it takes only a minute.
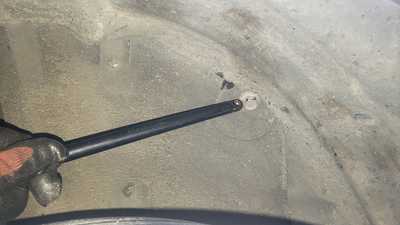
Screwdriver showing the first removed engine to mount bolt (14mm)
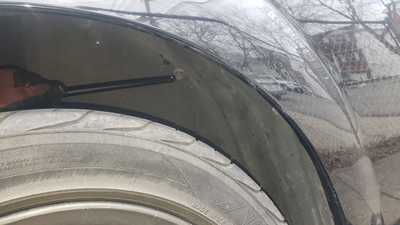
3 bolts hold the motor mount to the body. One is accessed from inside the RR wheel well (the fender liner is not manipulated for access).
4. Finally, it's time to get to the actual job. The bottom alternator bolt is removed with a 14mm socket. The top bolt is removed with a 12mm socket. Before completely removing this bolt use a hammer to knock the alternator lose for easy removal. I don't own a traditional dead blow hammer so I improvised by using the rubber handle of my 4lb steel hammer.
Sockets placed on the top (12mm) alternator mount bolt & lower (14mm) mounting bolt.
To recap: at this point you have the alternator loose with just the top bolt in place to keep it from falling. Do not forget there is 1 electrical connector clipped & 1 electrical wire screwed down on the alternator, as well as another electrical wire which is clipped into the alternator as a point of anchoring. This is important to remember prior to removing the top alternator bolt as it must be supported otherwise the wiring will be damaged.
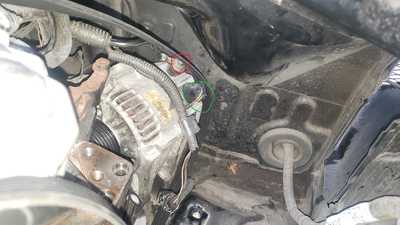
Red circle shows a connector which is not directly connected to the alternator, however it is anchored onto it by another clip. I undid this connector just to prevent any pulling/tugging during removal. Yes, mine is filthy & yes, I need to redo my valve cover gasket to address an oil leak....but for now we digress.
5. Remove the top alternator bolt, being sure to support the alternator. It can then be rotated in the open space on the right side of the engine to expose to electrical connector which must be unclipped (a small screwdriver is helpful to lift the clip) as we as the "generator wire" which is held in by a 10mm nut. You will also see the a wire which is anchored on the alternator (but not connected to it. This anchoring clip must be removed as well. At this point the alternator can be triumphantly delivered from the car.
*It should be noted that 2zz alternators are shown to have a third mounting bolt up somewhere near the intake however mine did not have this*
Alternator is pivoted to more easily access & remove the necessary connector (green circle) & wire (Red circle - 10mm socket).
6. At this point I would love to say "installation is the reverse of above", but I know you came here for one thing, and one thing only. Torque specs. Well hold your horses, we're almost there. Now reconnect the electrical connector & generator wire to the new alternator. Then mount the alternator using the top (12mm) bolt. Tighten it down as much as you can while allowing the alternator to pivot. This will make your life much easier as you pivot the alternator to find the sweet spot for the lower (14mm) mounting bolt to slide in place. The top (12mm) bolt is torqued to 18ft-lb. The lower (14mm) bolt is torqued to 40 ft-lb.
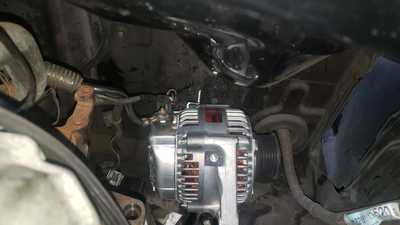
New alternator with connector & wire reattached prior to pivoting into position & attaching top mount bolt (12mm)
7. If you left your serpentine belt in place, ensure it is NOT around the motor mount as you put it back into the car. I chose to install the motor mount to the car body first. All of these bolts were tightened snug but not torqued to spec yet. Then, I placed a 2x4 across my jack to lift the engine under the oil pan to line up the motor mount to the engine. All of these bolts were tightened snug as well. With every bolt snug, all bolts can be tightened to 38 ft-lb. In all honesty I could not access every motor mount bolt with my torque wrench, YMMV. DO NOT forget to tighten the motor mount bolt in the wheel well.
8. Replace your serpentine belt with the correct routing, using the 18mm socket to loosen the tensioner. It is easiest to route the entire belt save one non-lipped pulley. Once tension is loosened work the belt around the chosen unlipped pulley. Ensure the serpentine belt is correctly oriented & centered around all pulleys.
9. Replace your RR wheel, drop the car back onto the ground, & torque your lug nuts. Probably a good time to put your old alternator in the box to be returned for a core charge if applicable. Pat yourself on the lips....with a brewski for a job well done.
Nicely done, FIF 👍 👍
"Think as we think", say many Spyder owners, "or you are abominably wicked, you are a toad". After I'd thought about, I said "I will then, be a toad."
Thank you, Stephen Crane
Thank you for taking the time to take pictures and do a write-up regarding this procedure. It is people like you who make this a better place. Thanks again.
Thanks for the feedback guys. Anything I can add is great but there are many with so much more in depth knowledge of these cars than I'll likely ever have so I'm just chipping away where I can
Good detailed write up with the fabled torque specs! Thanks for adding. I've unfortunately had to do this job 4 times already (don't buy an aftermarket alternator, no matter the warranty) and getting the bottom alternator bolt lined back up is by far the worst part for me.
If anyone wants to be lazier about it.... It's quite possible to get to the motor mount bolt in the wheel well without removing the wheel, just lift that corner of the car. Also, I don't support the engine at all when I take the mount out. Engine drops maybe 3/4" (my mounts are fairly new so YMMV) and I have one longer bolt in the mount bracket to ease the engine down with and back up again afterwards. I'm not responsible if you break something by doing things this way.
4 times....you've probably got way more pointers than I can give at this point, for better or worse. I had to remove the wheel to access the engine mount bolt because my car is lowered, I can def believe it's not an issue at stock ride height. As far as supporting the engine, the jack was used just to lift the engine & line up the motor mounts to get them hand tight & then torqued in a neutral position while not under stress. I don't know exactly how far my engine moved with the one mount removed (not much) but it was enough that the mounting holes no longer lined up. Since I had the jack out to put the car up I considered it a freebie...that damn jack weighs half as much as I do!
Gotcha. I can see the need to remove the wheel with coilovers. I'm lowered with RSR springs and koni struts and still have enough droop to have working space. I'm always hesitant to put a jack under the oil pan because I hate having to reseal oil pans.
4 times is definitely too many. Second time I brought it back to the auto parts store I spoke with the manager and got my account notated for refund if I came back again. Finally got my refund. Used OEM alternator is going strong.
I have done the job two times. I also received a bad reman but I got lucky on the replacement but since then I haven't put that many miles on the car but all is well for now. I have replaced the side motor mount about 6 or 7 times doing various things and one time I had cross threaded one of the nuts which I had to chase with a tap.
The best way to get the motor mount on is to support the engine using a piece of plywood under the oil pan before the mount is removed otherwise it will sag. Thread all of the bolts loosely so there is enough to shift the mount so the other bolts are not misaligned when threading them in. Once everything is threaded you can tighten everything up.
